Introduction to Old-Time Fudge
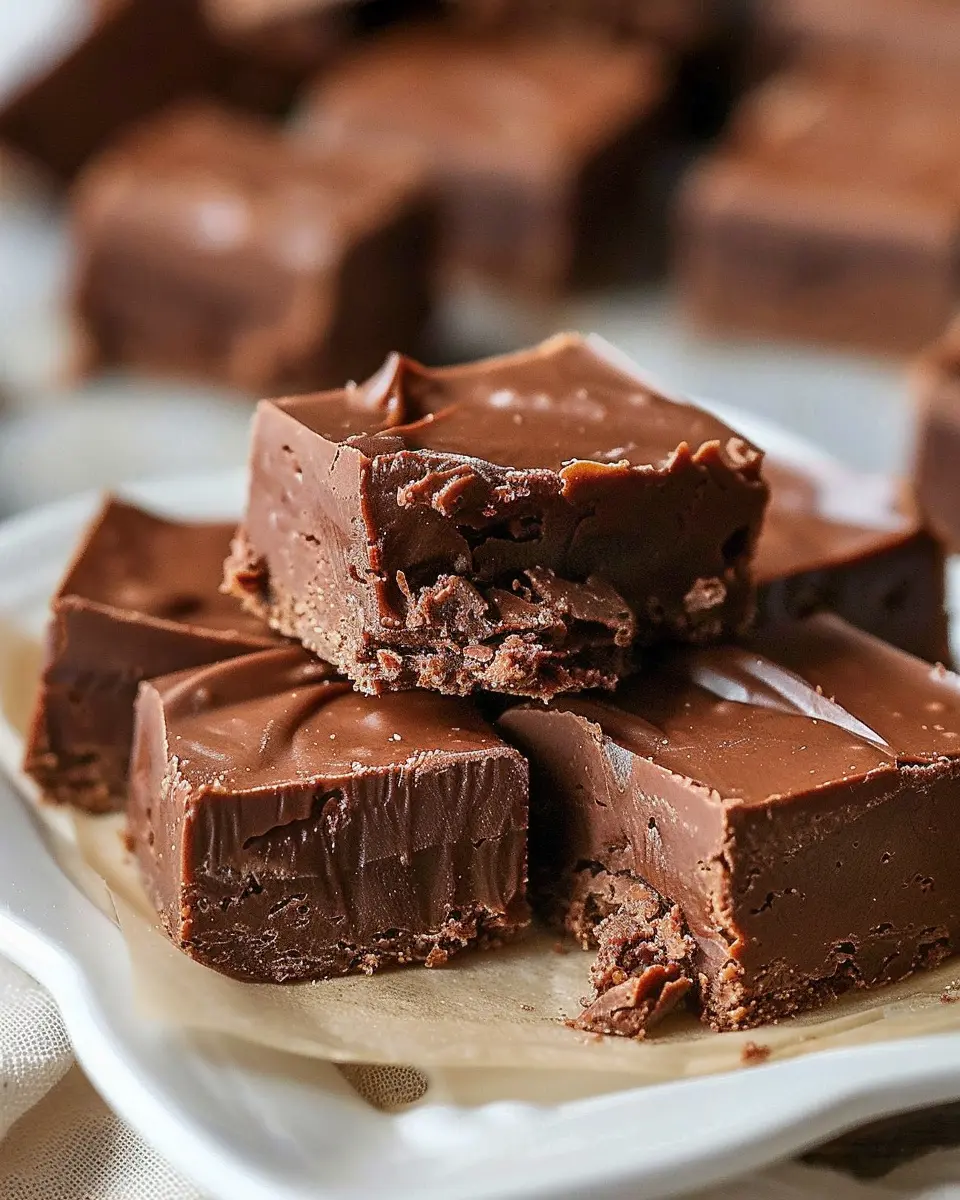
If you’ve ever taken a bite of old-time fudge, you know that it’s more than just a sweet treat—it’s a blast from the past that leaves a lasting impression. This classic confectionery has been a beloved staple in American homes, especially during holidays, family gatherings, and county fairs. But what is it about old-time fudge that makes it stand out?
Why is Old-Time Fudge a Timeless Treat?
First and foremost, it’s about nostalgia. For many, old-time fudge conjures memories of grandma’s kitchen, where the air was rich with the scent of melting chocolate and caramelizing sugar. According to historians, fudge made its debut in the late 19th century and quickly captured hearts across generations. What sets it apart from modern sweets is its creaminess and depth of flavor, achieved by traditional techniques that don’t just rely on quick fixes or artificial ingredients.
Another reason this delectable dessert withstands the test of time is its versatility. While classic recipes often call for simple ingredients like sugar, butter, and cocoa, you can easily customize old-time fudge to suit your taste. Want it nutty? Toss in some chopped walnuts. Prefer a fruity twist? Try adding dried cherries or cranberries.
Moreover, making fudge can be a delightful bonding experience. Whether you’re gathering with friends or family, cooking this rich treat together creates moments that transcend generations. Just imagine sharing stories over boiling sugar and chocolate, and the laughter that fills the kitchen as everyone eagerly anticipates the first taste.
Additionally, recent studies show that indulging in rich desserts like fudge can trigger the release of dopamine in your brain, which enhances your mood. So, not only is it a delicious dessert, but it can also bring joy and comfort, especially during stressful times.
If you’re ready to step into this world of decadence, make sure to check out NPR’s history of fudge to appreciate how this timeless treat has evolved. And trust me, your taste buds will thank you when you whip up a batch of old-time fudge. Get ready for a delightful journey into sweetness!
Ingredients for Old-Time Fudge
Creating that perfect batch of old-time fudge doesn’t have to be complicated. In fact, the ingredients are straightforward and likely what you already have in your pantry! Here’s what you’ll need to whip up this delightful treat:
- Granulated Sugar: 2 cups, the base sweetness for your fudge.
- Unsweetened Cocoa Powder: ½ cup, for that rich chocolate flavor that satisfies.
- Milk: 1 cup, which brings all the ingredients together and adds creaminess.
- Butter: ½ cup (1 stick), used for a smooth, melt-in-your-mouth texture.
- Vanilla Extract: 1 teaspoon, to enhance the flavors and impart a lovely aroma.
- Chopped Nuts: 1 cup (optional), add walnuts or pecans for a delightful crunch.
- Salt: A pinch, to balance the sweetness.
Just think about it: a family gathering, a chilly evening, and the scent of old-time fudge wafting through the house. Doesn’t that sound inviting? For those who love a personal touch, consider substituting some basic ingredients with alternatives like coconut milk for a dairy-free version or tossing in a hint of peppermint extract for a seasonal twist. For some extra inspiration, check out these tips on baking substitutions that can elevate your fudge experience! Let’s get started on making something truly special.
Step-by-Step Preparation of Old-Time Fudge
Creating old-time fudge at home not only brings a wave of nostalgia but also fills your kitchen with a rich, sweet aroma that’s nearly irresistible. The process is both simple and rewarding, and before you know it, you’ll have delicious, creamy fudge ready to share with friends and family! Let’s guide you through the steps.
Preparing the Pan
Start by preparing your pan, which is crucial for ensuring your fudge sets properly. You’ll need an 8×8-inch square pan lined with parchment paper—a little overhang will make transferring the fudge easier later. If you like your fudge extra smooth, lightly grease the parchment with butter or cooking spray. This helps avoid any stickiness that can ruin your perfectly crafted candy!
Mixing the Base for Fudge
In a large saucepan, combine the basic ingredients to create the foundation of your old-time fudge:
- 2 cups of granulated sugar
- 2/3 cup of evaporated milk
- 1/4 cup of unsweetened cocoa powder
Once the dry ingredients are combined, whisk them until there are no lumps left. This step ensures an even mix, providing a luscious texture when cooked.
Boiling the Fudge Mixture
Next, place your saucepan over medium heat. Stir continuously as you bring the mixture to a rolling boil, which is an important part of the process. Once boiling, allow it to bubble for about 5 minutes without stirring—this creates those signature fudge crystals. Make sure to keep an eye on the pot to prevent any spilling over the sides.
Simmering to the Perfect Temperature
Now, it’s time to get serious about the temperature. Using a candy thermometer (if you have one), you’ll want to let the mixture simmer until it reaches soft ball stage, which is 234°F (112°C). If you don’t have a thermometer, drop a small amount of the fudge into cold water; it should form a soft ball that flattens when removed.
Adding Butter and Vanilla
Once your fudge reaches the magic temperature, remove it from the heat and stir in:
- 2 tablespoons of unsalted butter
- 1 teaspoon of pure vanilla extract
This is where the magic happens! The butter adds a rich, creamy texture, while the vanilla gives it that classic flavor. Just imagine the warmth—it’s enough to get anyone excited about trying the fudge.
Beating the Fudge for the Right Consistency
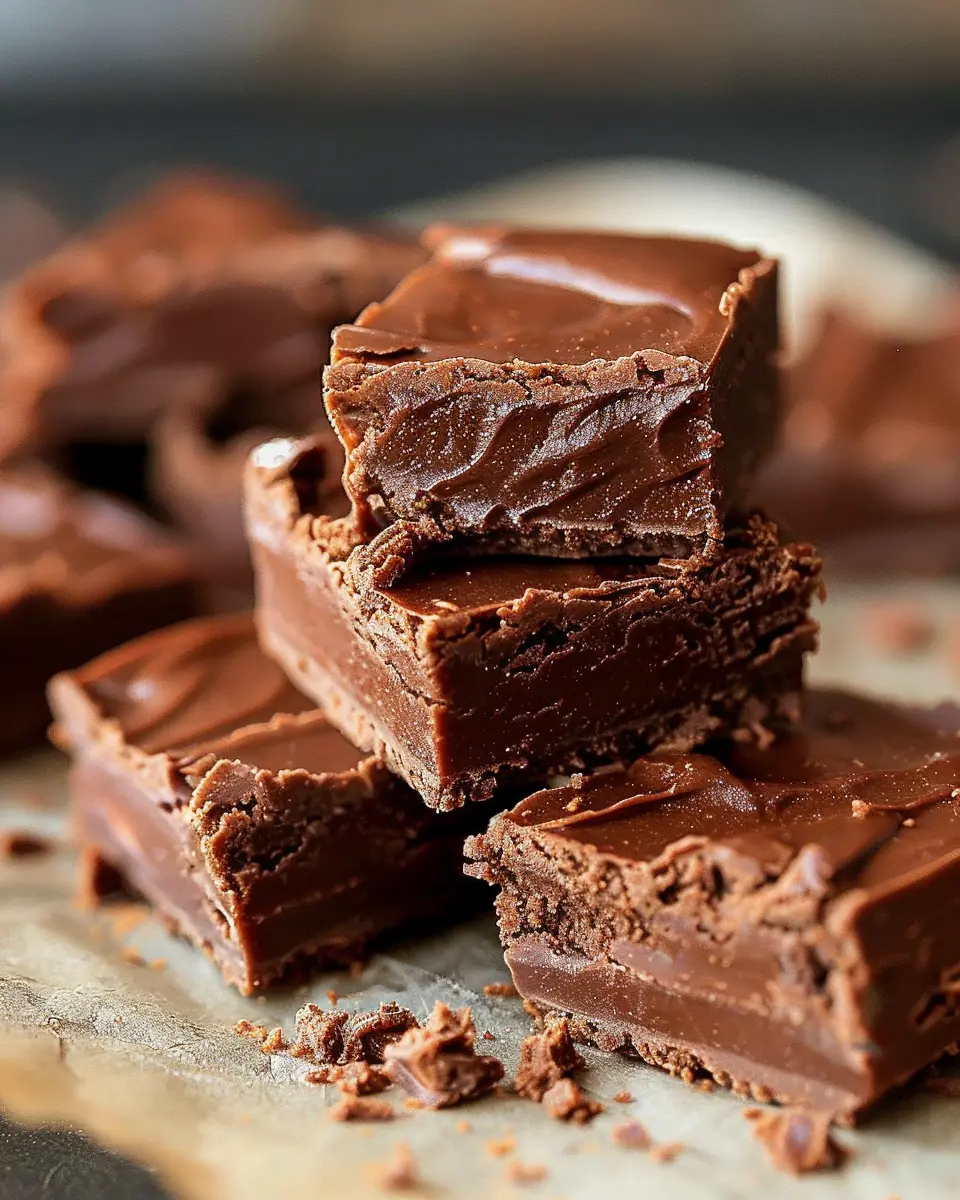
Now for the fun part! Allow the mixture to cool for about 10 minutes. Then, grab a sturdy wooden spoon and beat the mixture vigorously until it becomes thick and loses its shine—this can take about 5 to 10 minutes. This step is essential for that delightful, chewy consistency that defines old-time fudge.
Setting the Fudge in the Pan
Pour your beautifully beaten fudge into the prepared pan and spread it evenly using a spatula. Let it sit at room temperature until fully set—this may take several hours. If you’re in a hurry, you can hasten the process by placing it in the refrigerator for about an hour, although the flavor may develop better when allowed to cool naturally.
Cutting and Serving the Fudge
Once set, it’s time to cut your fudge. Lift it out of the pan using the parchment overhang and place it on a cutting board. Use a sharp knife to cut it into bite-sized squares. Consider serving your fudge with a sprinkle of sea salt or even drizzling it with some melted chocolate for an added touch!
Feel free to enjoy the fudge right away, but it can be stored in an airtight container for up to two weeks—if it lasts that long! Share it with friends or keep it as a delightful treat for yourself during those busy weeks.
For more tips on discovering the best candy recipes, feel free to check out What’s Cooking America! Happy candy making!
Variations on Old-Time Fudge
Fudge is one of those nostalgic treats that brings back sweet memories of family gatherings and holiday celebrations. While the classic chocolate fudge holds a special place in our hearts, there’s a world of delicious variations just waiting to be explored. Here’s a guide to take your old-time fudge game to the next level!
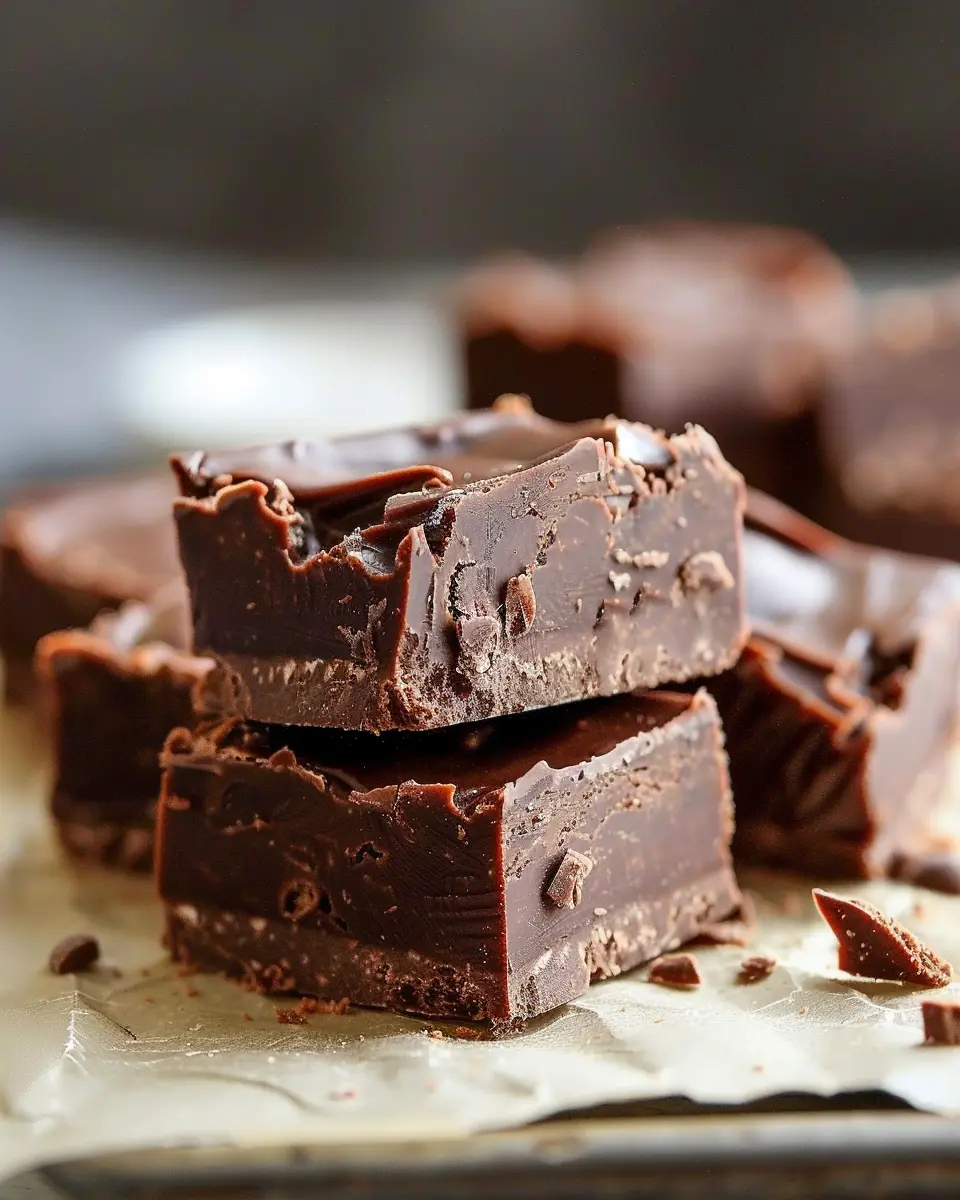
Classic Chocolate Fudge
Let’s start with the foundational favorite: classic chocolate fudge. This creamy, rich delight typically includes ingredients like sugar, chocolate, milk, and butter. It’s essential to get the temperature right when cooking the fudge mixture to achieve that melt-in-your-mouth texture. For an even more decadent experience, try adding a pinch of sea salt or a splash of coffee. The balance of flavors can really heighten the chocolatey goodness!
Nutty Fudge Variations
If you’re a fan of crunchy textures, consider incorporating nuts into your fudge. Chopped walnuts, pecans, or even macadamia nuts can add a delightful crunch. Not only do they enhance the flavor, but they also bring additional health benefits. For those who want a twist, try candied pecans or almond extracts for a unique mix. You can find excellent nut options at Nuts.com to suit your preference.
Swirled Fudge with Other Flavors
Now, if you’re feeling adventurous, why not create swirled fudge with other flavors? Imagine rich chocolate fudge marbled with raspberry, caramel, or even peanut butter. Simply prepare two distinct fudge mixtures and swirl them together before they set. The visual effects are stunning and will definitely impress your friends at gatherings. Try experimenting with flavors like mint or orange for a refreshing twist, and share your creations on social media!
These variations on old-time fudge not only bring fun to your kitchen but also let you customize each batch to your liking. Whether you stick to the classic or explore new tastes, each piece will be a piece of sweet nostalgia!
Cooking Tips and Notes for Old-Time Fudge
Essential tools you’ll need
To create the best old-time fudge, having the right tools at your fingertips makes a world of difference. Here’s what you need:
- Heavy-bottom saucepan: This helps distribute heat evenly—crucial for getting that perfect texture.
- Candy thermometer: Essential for checking your temperature accurately. Aim for the soft ball stage around 234°F to 240°F.
- Wooden spoon or silicone spatula: Perfect for stirring and preventing your fudge from sticking, it also adds that nostalgic touch.
- Greased baking dish or parchment paper: Helps in easily removing the fudge after it sets.
Common mistakes to avoid
Even seasoned bakers can trip up when making old-time fudge. Here are some common pitfalls to watch out for:
- Not mixing enough: Fudge needs to be stirred thoroughly to develop a smooth, creamy texture.
- Rushing the cooling process: Letting your fudge cool too quickly can lead to a grainy finish. Patience is key here!
- Ignoring humidity: Fudge can be sensitive to weather. On humid days, it may not set well. Check the forecast before you start—learn more about cooking in various conditions here.
By keeping these tips in mind, you’ll be well on your way to crafting the perfect old-time fudge. Happy cooking!
Serving Suggestions for Old-Time Fudge
Pairing Fudge with Drinks
When it comes to enjoying your old-time fudge, the right drink can elevate the experience to new heights. Think creamy hot chocolate for a cozy evening or a rich cup of coffee to balance the sweetness. For a refreshing option, try pairing it with iced herbal tea, which can provide a lovely contrast without overwhelming your taste buds. The key here is to choose beverages that complement the rich, chocolatey flavors of your fudge but don’t outshine them.
Creative Ways to Present Fudge
Presentation is everything, especially when it comes to desserts like old-time fudge. Here are some fun ideas to make your fudge the star of the show:
- Gift Boxes: Place your fudge in decorative boxes or tins for a charming homemade gift.
- Platter Display: Arrange slices on a beautiful platter with fresh fruit and nuts for variety.
- Dessert Table: Create a dedicated dessert station at gatherings where guests can serve themselves, making it interactive and fun.
By incorporating these suggestions, your old-time fudge not only tastes fantastic but looks fabulous too! For more festive presentation ideas, consider exploring platforms like Pinterest for inspiration.
Time Breakdown for Making Old-Time Fudge
When it comes to creating that perfect old-time fudge, it’s all about timing. Here’s a quick glance at how long each step will take so you can plan your fudge-making adventure.
Preparation time
Gathering ingredients and equipment takes about 10 to 15 minutes. Be sure you have everything ready—trust me, nothing feels worse than realizing you’re missing sweetened condensed milk mid-recipe!
Cooking time
The actual cooking part of your old-time fudge will take around 20 minutes. This includes melting the chocolate and butter until soft and creamy. Keep stirring to ensure that delicious, smooth texture we all crave!
Cooling time
Once your fudge is cooked to perfection, it needs to cool and set for at least 2 hours. Try to resist the urge to dig in right away; this step is crucial for achieving that perfect fudgy consistency.
Planning these times will help ensure your venture into making old-time fudge is a delightful success! If you’re interested in exploring similar recipes, check out King Arthur Baking or Food Network for more inspiration.
Nutritional Facts for Old-Time Fudge
When making a classic treat like old-time fudge, it’s essential to know what you’re indulging in. Here’s a quick breakdown of the nutritional facts per serving:
Calories per serving
Each piece of old-time fudge typically contains around 100 calories. If you’re watching your intake, it’s good to enjoy these sweet morsels in moderation!
Sugar content
With approximately 14 grams of sugar per serving, it’s no surprise that old-time fudge is a rich delight. To put that into perspective, the American Heart Association recommends limiting added sugars to about 6 teaspoons for women and 9 teaspoons for men per day.
Fat content
You’ll find about 4 grams of fat in a serving. While some fats can be beneficial, keep in mind that fudge is often made with ingredients like butter or cream that contribute to this total.
By knowing these nutritional facts, you can enjoy your old-time fudge while keeping your dietary goals in check. For a deeper dive into nutrition or healthier dessert options, check out resources from the Harvard T.H. Chan School of Public Health or the USDA National Nutrient Database.
FAQ about Old-Time Fudge
How long does homemade fudge last?
When it comes to storing your delicious old-time fudge, you’ll be pleased to know it can last quite a while! Properly stored in an airtight container at room temperature, fudge can stay fresh for up to two weeks. If you’re looking to keep it even longer, consider refrigerating it, where it can last for about a month. Just remember, homemade fudge is best enjoyed fresh, so try to share it with friends or family to avoid any long-lasting temptations!
Can I make fudge without a thermometer?
Absolutely! While using a thermometer can help ensure the perfect texture and consistency, you can still whip up some delightful old-time fudge without one. The key is to rely on the “soft ball” test: drop a small amount of the fudge mixture into cold water—if it forms a soft ball that holds its shape when removed, it’s ready to pour into your pan. Just be patient and keep an eye on the mixture as it cooks.
What are some tips for fixing grainy fudge?
Grainy fudge can be a real letdown, but don’t fret—there are ways to salvage it. If you find your fudge isn’t as smooth as you’d like, try the following:
- Reheat gently: Place the fudge back in a pot, add a splash of milk or cream, and reheat on low while stirring.
- Blend it: Pour the fudge into a blender or food processor and pulse it until smooth.
- Avoid overcooking: Next time you make fudge, be cautious of cooking it too long, which can lead to crystallization.
For more in-depth tips on making fudge, check out resources like Joy of Baking.
By keeping these pointers in mind, you’ll ensure your fudge-making adventures remain delightful and successful!
Conclusion on Old-Time Fudge
Bringing back the classic joy of old-time fudge can be a delightful culinary journey. Whether you’re reminiscing about childhood memories or simply looking for a sweet treat to impress friends, this recipe is your go-to.
As you savor your first bite, think about adding personalized touches like nuts or flavor extracts, making it uniquely yours. Don’t hesitate to share your creation on social media; it’s a wonderful way to connect and inspire others.
For more tips on mastering desserts, check out Baker’s Journal or Serious Eats. Embrace the nostalgia and enjoy the sweet moments—happy fudging!
PrintOld-Time Fudge: The Best Sweet Treat to Satisfy Your Cravings
A delightful and rich old-time fudge recipe that is sure to satisfy your sweet tooth cravings.
- Prep Time: 10 minutes
- Cook Time: 15 minutes
- Total Time: 25 minutes
- Yield: 16 servings 1x
- Category: Desserts
- Method: Stovetop
- Cuisine: American
- Diet: Vegetarian
Ingredients
- 2 cups granulated sugar
- 1/2 cup unsweetened cocoa powder
- 1/2 cup milk
- 1/4 cup butter
- 1 teaspoon vanilla extract
- 1 cup chopped nuts (optional)
Instructions
- In a medium saucepan, combine sugar, cocoa powder, and milk.
- Cook over medium heat, stirring constantly, until the mixture comes to a boil.
- Allow to boil for 5 minutes without stirring.
- Remove from heat and stir in butter and vanilla extract until smooth.
- If adding nuts, fold them in now.
- Pour into a greased 8-inch square pan and let it cool completely before cutting into squares.
Notes
- For a creamier texture, stir vigorously as it cools.
- Ensure the pan is properly greased to prevent sticking.
Nutrition
- Serving Size: 1 piece
- Calories: 120
- Sugar: 15g
- Sodium: 50mg
- Fat: 5g
- Saturated Fat: 3g
- Unsaturated Fat: 2g
- Trans Fat: 0g
- Carbohydrates: 18g
- Fiber: 1g
- Protein: 2g
- Cholesterol: 10mg
Keywords: Old-Time Fudge, Fudge Recipe, Sweet Treats