Introduction to Chocolate Thumbprint Cookies
The allure of homemade cookies
There’s something undeniably comforting about the aroma of cookies baking in the oven. The very act of making homemade cookies can be therapeutic, providing a much-needed escape from the hustle of daily life. Whether you’re prepping for a cozy night in or hosting friends for a casual gathering, cookies have a unique way of bringing joy to any occasion.
What makes this experience even more enchanting is the variety of cookies to choose from. Chocolate chip, oatmeal raisin, and snickerdoodles all have their fan clubs. But if you’re looking for something a bit different, then Chocolate Thumbprint Cookies might just be your new go-to. They offer both a delightful flavor and an element of surprise, thanks to their luscious filling nestled in a rich chocolate base.
Why choose chocolate thumbprint cookies?
You might wonder, why specifically opt for Chocolate Thumbprint Cookies? For starters, they’re incredibly easy to make, making them a perfect choice for both novice bakers and seasoned pros. The simple dough requires common ingredients, and the process doesn’t take much time at all. Plus, who doesn’t love a cookie that lets you get a bit creative? The joy of thumbprinting your dough and filling it with your favorite jam or chocolate ganache is both fun and satisfying.
Another perk is versatility. Feel free to experiment with different fillings. Whether you go for a classic raspberry jam or a delightful peanut butter center, the choices are nearly endless! Plus, these cookies can be dressed up for special occasions or kept simple for everyday treats.
In fact, many baking aficionados laud thumbprint cookies as a timeless classic. According to the American Cookie Council, cookies have been a staple in American homes since colonial times. So, by making Chocolate Thumbprint Cookies, you’re not only enjoying a delicious treat but also participating in a sweet legacy.
For more inspiration on different cookie variations, you might want to check out resources like the National Association of Cookie Lovers or The Cookie Dough Diaries for recipe collections. Now, let’s get to baking!
Ingredients for Chocolate Thumbprint Cookies
Creating the perfect batch of Chocolate Thumbprint Cookies requires just a few essential ingredients that you likely already have in your kitchen. Here’s what you’ll need:
Essential ingredients for the cookies
- Flour: All-purpose flour creates the sturdy base of your cookies.
- Cocoa powder: Unsweetened cocoa powder gives that deep, rich chocolate flavor. Make sure to sift it for a smooth texture.
- Butter: Unsalted butter adds creaminess and helps bring your cookies together.
- Sugar: A mix of granulated and brown sugar enhances sweetness and boosts moisture.
- Eggs: A key ingredient for binding, eggs also contribute to the cookies’ overall richness.
- Vanilla extract: Just a splash adds a lovely depth to the flavor.
Ingredients for the chocolate ganache
For that irresistible topping, you’ll need:
- Dark chocolate: High-quality dark chocolate chips or bars create a luscious ganache.
- Heavy cream: This is the magic that transforms chocolate into silky ganache.
With these ingredients at hand, you’re on your way to baking delightful Chocolate Thumbprint Cookies. Ready to impress your friends and family? Check out more tips on selecting the best chocolate at Fine Chocolate Industry Association for advice on handpicking quality chocolate.
Happy baking!
Preparing Chocolate Thumbprint Cookies
Making Chocolate Thumbprint Cookies is a delightful experience, and I’m here to guide you through each step to ensure your baking journey is both fun and rewarding. Let’s dive in!
Gather and prepare your ingredients
Before you begin, it’s crucial to gather all your ingredients. Having everything on hand makes the process smoother and more enjoyable. Here’s what you’ll need:
- 1 cup unsalted butter, softened
- 1 cup granulated sugar
- 1/2 cup brown sugar, packed
- 3 cups all-purpose flour
- 1/2 cup cocoa powder
- 1 teaspoon baking powder
- 1/2 teaspoon salt
- 1 teaspoon vanilla extract
- 1 egg
For the chocolate ganache filling:
- 1 cup semi-sweet chocolate chips
- 1/2 cup heavy cream
Take a moment to measure and prepare your ingredients. This not only saves time but also helps you avoid any last-minute surprises!
Creaming the butter and sugars
This part is probably one of my favorites! Start by placing the softened butter in a large mixing bowl. Using a hand mixer or stand mixer, add the granulated and brown sugars. Beat them together for about 2-3 minutes on medium speed until the mixture becomes light and fluffy. This creamy consistency is vital, as it incorporates air into the batter, resulting in a wonderfully tender cookie.
Did you know that the creaming process is essential for achieving the perfect texture in baked goods? As you mix, enjoy the sweet smell wafting up—it’s always a good sign you’re on the right track!
Mixing in the dry ingredients
Once your butter and sugars are creamed, it’s time to add the dry ingredients. In a separate bowl, whisk together the flour, cocoa powder, baking powder, and salt. Gradually add this mixture to the creamed ingredients in three batches, mixing on low speed. This method prevents any floury mess and helps blend the ingredients evenly.
By the way, if you’re curious about the science behind baking, The Joy of Cooking offers great insights into why ingredient ratios matter!
Shaping the cookie dough
Now that your dough is mixed, it’s time to shape your Chocolate Thumbprint Cookies. Using a cookie scoop or your hands, take about a tablespoon of dough and roll it into balls. Place them on a baking sheet lined with parchment paper, spacing them about 2 inches apart. This will allow your cookies to spread as they bake and prevent them from sticking together.
Chilling the dough and preparing to bake
To ensure the best texture, chilling your dough is essential. Pop the baking sheet with the cookie dough into the refrigerator for about 30 minutes. This step firms up the butter, making the cookies less likely to spread excessively when baking.
While the dough chills, you can preheat your oven to 350°F (175°C). It’s always a good idea to preheat in advance so your cookies have a warm place to bake once you’re ready!
Baking to perfection
After chilling, it’s time to bake your cookies! Place the chilled cookie dough into the preheated oven and bake for 10-12 minutes. You want them to be slightly soft in the center when you take them out, as they will harden upon cooling. Keep an eye on them—nothing is more disheartening than burnt cookies, right?
Making the chocolate ganache
While your cookies are baking, it’s the ideal time to prepare the chocolate ganache that will fill your Chocolate Thumbprint Cookies. In a small saucepan over low heat, combine the semi-sweet chocolate chips and heavy cream. Stir continuously until the chocolate is completely melted and the mixture is smooth. Remove it from heat and let it cool slightly; it will thicken as it cools.
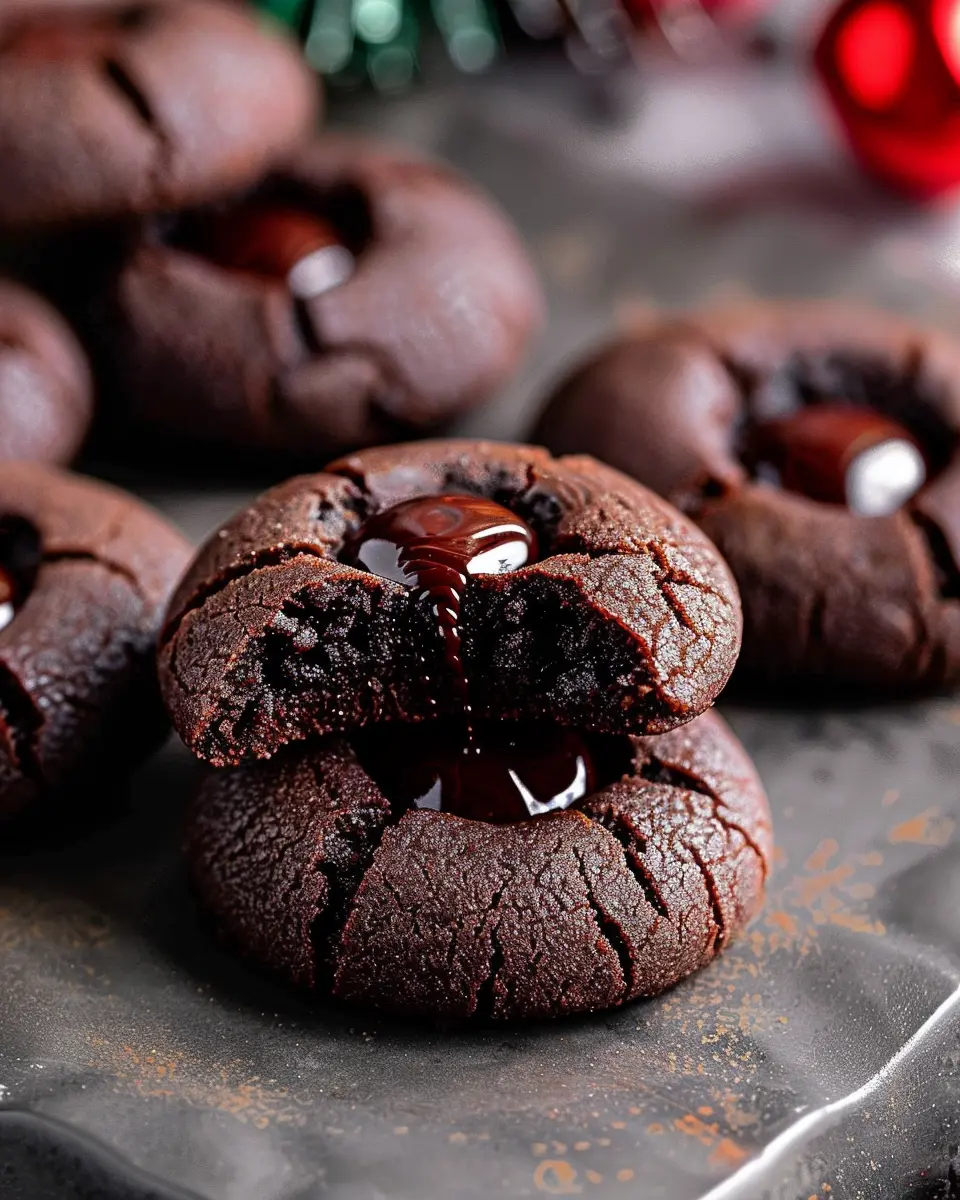
Assembling the thumbprint cookies
Once your cookies have cooled, it’s time to create the iconic thumbprint! Using your thumb (or the back of a teaspoon), gently make an impression in the center of each cookie. Fill each indentation with a spoonful of the luscious chocolate ganache.
Now, step back and admire your handiwork—it’s time for a well-deserved taste test! These Chocolate Thumbprint Cookies are perfect for sharing or indulging in all by yourself. Enjoy!
Variations on Chocolate Thumbprint Cookies
When it comes to Chocolate Thumbprint Cookies, the possibilities are practically endless! Let’s dive into some fun variations that can elevate these delightful treats to new heights.
Nutty Chocolate Thumbprint Cookies
If you’re a fan of nuts, you’ll love this variation! Adding a nutty twist to your Chocolate Thumbprint Cookies not only enhances the flavor but also adds a delightful crunch. Here’s a simple approach:
- Nut Choices: Consider using chopped walnuts, pecans, or even roasted almonds.
- Incorporation: Mix finely chopped nuts directly into your cookie dough for a nutty base. Alternatively, roll the dough into balls and coat them in crushed nuts before making your thumbprint.
- Filling Options: Instead of the typical chocolate ganache, try using a nut butter, such as peanut or almond butter, for the filling. The creamy texture pairs beautifully with the crispy cookie.
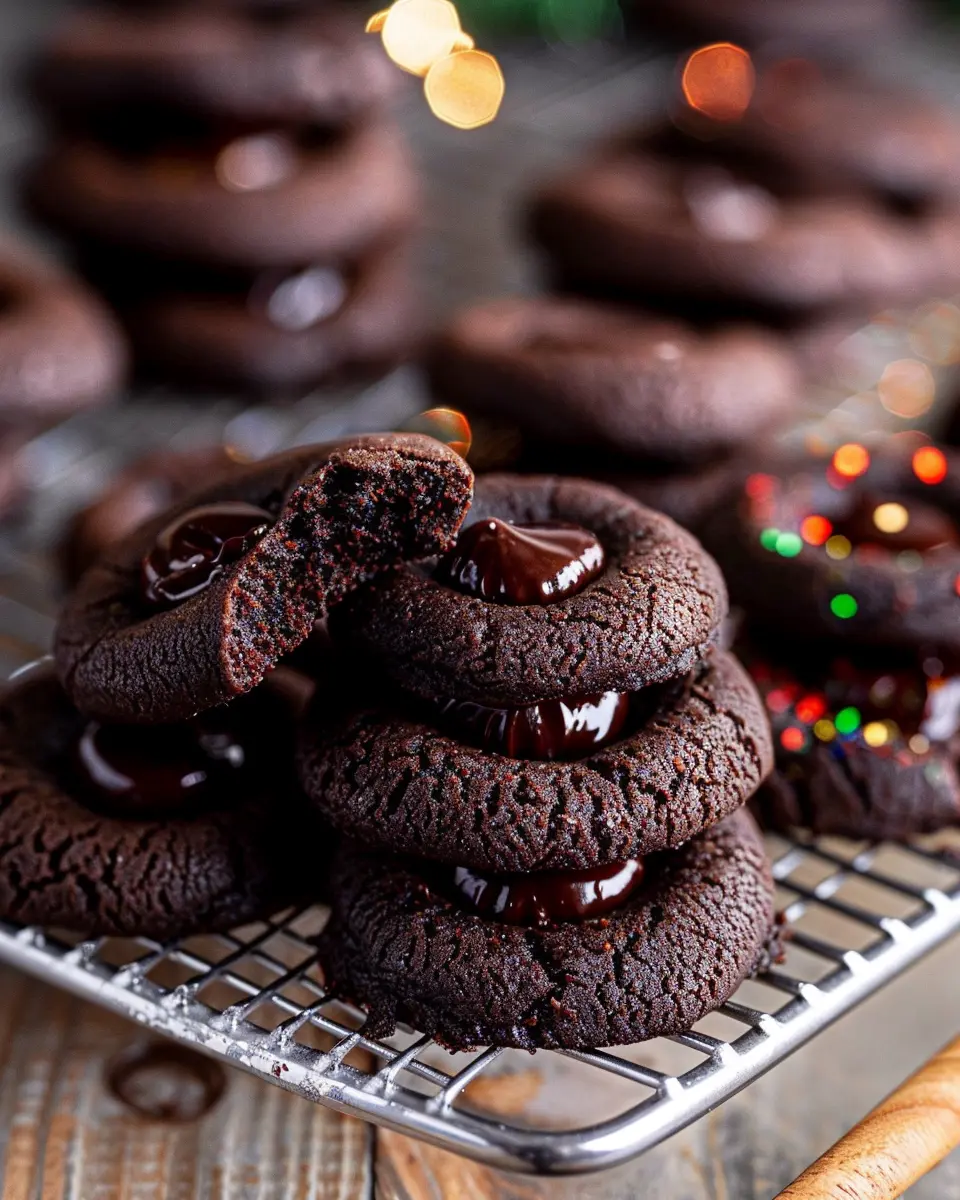
Holiday-Themed Chocolate Thumbprint Cookies
Bring some festive cheer to your baking with holiday-themed Chocolate Thumbprint Cookies! These cookies can be tailored to suit any celebration:
- Seasonal Flavors: For a cozy touch, add spices like cinnamon or nutmeg to the cookie dough.
- Filling Variations: Swap out the traditional filling for something seasonal, like eggnog-flavored frosting or a peppermint chocolate ganache.
- Decorative Touches: After baking, consider drizzling melted white chocolate on top or sprinkling colorful festive sprinkles to make them pop.
These variations not only cater to different tastes but also allow you to personalize your cookies for any occasion. For more festive ideas, check out resources like Taste of Home or Serious Eats for inspiration!
Baking Notes for Chocolate Thumbprint Cookies
Tips for Achieving the Best Texture
For perfectly soft and chewy Chocolate Thumbprint Cookies, focus on the butter’s temperature. Use room-temperature butter for a light, crumbly texture. Make sure not to over-mix the dough; just combine until uniform to prevent dense cookies. Chilling the dough for at least 30 minutes can enhance the flavors and help maintain the cookie shape while baking.
Common Mistakes to Avoid
One of the most common pitfalls when making Chocolate Thumbprint Cookies is overbaking. Watch for slight firmness at the edges while keeping the centers a bit soft; they will firm up as they cool. Also, resist the urge to skip the thumbprint step—it’s what makes these cookies delightful and perfect for filling with melted chocolate or jam. You can check out more tips on cookie failures here to ensure your baking is a success!
Remember, practice makes perfect, and with these notes, you’ll be on your way to mastering Chocolate Thumbprint Cookies that are sure to impress friends and family alike!

Serving suggestions for Chocolate Thumbprint Cookies
Perfect Pairings and Presentation Ideas
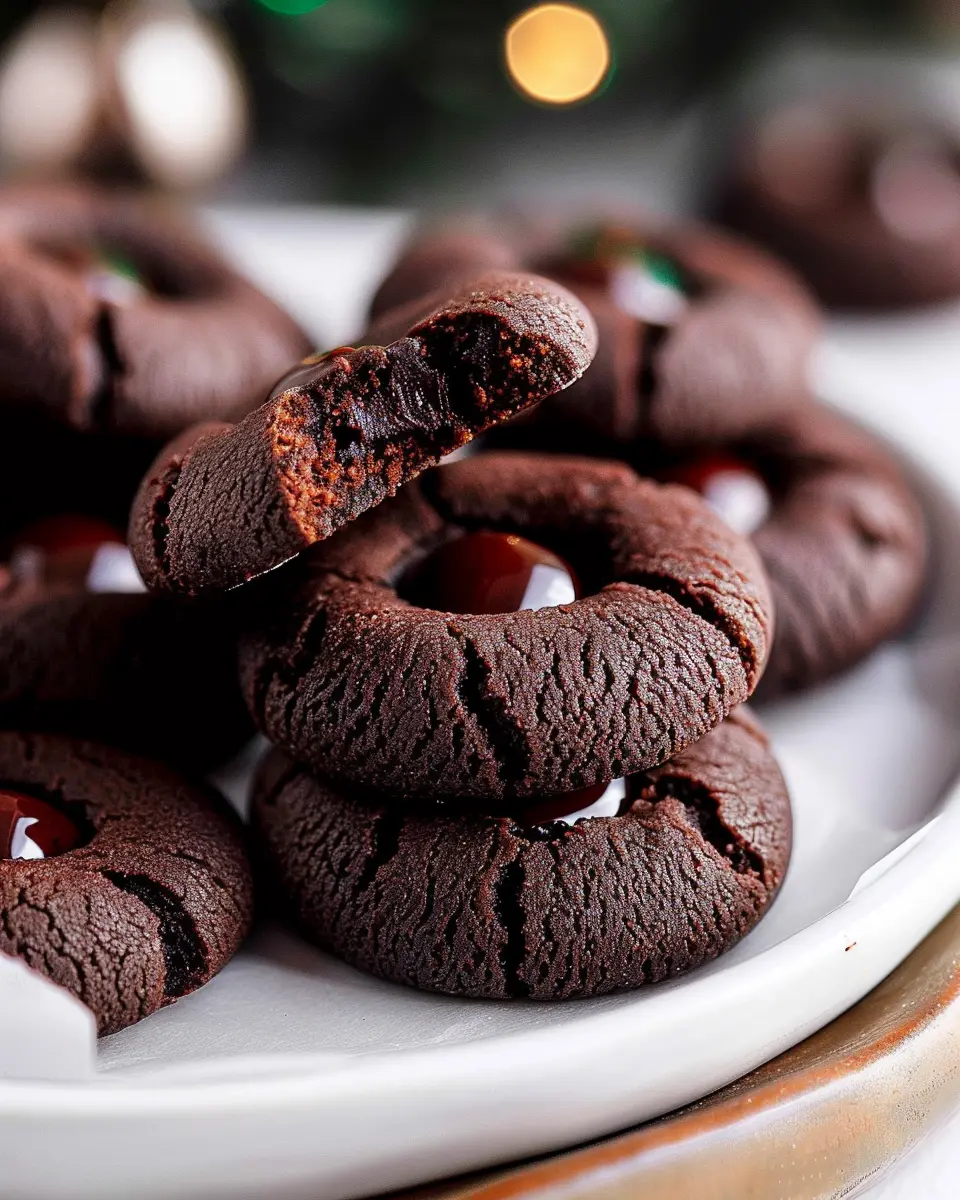
When it comes to Chocolate Thumbprint Cookies, the right accompaniments can elevate your cookie experience from delightful to downright unforgettable. First off, consider pairing these delicious cookies with a freshly brewed cup of coffee or a comforting mug of hot cocoa. The rich chocolate flavor melds beautifully with the warmth of these beverages.
For a stunning presentation, stack your cookies on a cake stand or arrange them on a colorful platter. Adding some decorative parchment paper or fresh mint leaves can give that extra flair to your dessert table. If you’re hosting a gathering, think about creating a dessert bar that includes Chocolate Thumbprint Cookies, along with other treats like brownies and fruit tarts.
And don’t forget about gifting! These cookies are perfect for sharing. Package them in a decorative tin or box, and they become a heartfelt present for friends or coworkers—who wouldn’t love a taste of homemade goodness?
For more presentation tips, check out this resource with expert ideas on dessert styling.
Tips for Making Perfect Chocolate Thumbprint Cookies
Secret ingredients for extra flavor
To elevate your Chocolate Thumbprint Cookies, consider adding a splash of vanilla extract for warmth and depth. A pinch of espresso powder can also intensify the chocolate flavor, making every bite more decadent. You might even try using dark chocolate or a mix of chocolate chips for a delightful texture contrast. These small tweaks can turn your cookies from good to unforgettable!
If you’re interested in diving deeper into flavor profiles, check out this article from Serious Eats on enhancing chocolate desserts.
Equipment you’ll need for success
Having the right tools on hand makes a world of difference when baking Chocolate Thumbprint Cookies. Here’s a quick checklist to get you fully equipped:
- Mixing Bowls: A set of different sizes for efficient preparation.
- Electric Mixer: For smooth creaming of butter and sugar.
- Baking Sheets: Choose flat, uncoated ones for even baking.
- Parchment Paper: To prevent sticking and ensure easy cleanup.
- Cookie Scoop: For perfectly rounded cookie shapes.
With these tools, you’ll set yourself up for cookie-baking success! Don’t forget to preheat your oven to the right temperature, as this is crucial for achieving that ideal texture. Happy baking!
Time Details for Chocolate Thumbprint Cookies
Preparation Time
Getting started on your Chocolate Thumbprint Cookies is a breeze! You’ll want to set aside about 15-20 minutes for preparation. This includes gathering your ingredients and mixing the dough until it’s just right. Pro tip: let your butter soften a bit before you start—it makes the mixing process much smoother.
Baking Time
Once your cookies are rolled and filled with delicious chocolate, it’s time for the oven! Bake the cookies for about 12-15 minutes. You’ll want to watch them closely to achieve that perfect chewy texture.
Total Time
In total, you’re looking at around 30-40 minutes from start to finish. Just enough time to whip up a delightful treat that impresses both friends and family. For more cookie inspiration, check out popular baking websites like King Arthur Baking or Serious Eats. Happy baking!
Nutritional Information for Chocolate Thumbprint Cookies
Calories
These delightful Chocolate Thumbprint Cookies pack a punch in flavor without overloading on calories. Each cookie typically contains about 100 calories, making it a delightful treat that won’t derail your daily meal plan.
Sugar Content
When it comes to sweetness, a single cookie features around 7 grams of sugar. This moderate sugar content allows you to satisfy your sweet tooth while keeping your dessert indulgence in check.
Key Nutrients
Aside from being delicious, these cookies also provide some key nutrients, including:
- Iron: Important for your energy levels and overall health.
- Calcium: Supports strong bones, a must for those of us leading an active lifestyle.
- Fiber: Helps in digestion and keeps you feeling fuller longer.
If you’re looking to delve deeper into the nutritional profiles of your favorite baked goods, resources such as the USDA FoodData Central can be quite helpful. Remember, balance is key, and enjoying a cookie here and there can complement a healthy lifestyle.
FAQs about Chocolate Thumbprint Cookies
What if I don’t have cocoa powder?
If you find yourself in the middle of your baking session and realize you’re out of cocoa powder, don’t worry! You can substitute it with unsweetened carob powder, which has a similar flavor profile. Alternatively, if you have dark chocolate on hand, melt some down and use it in place of cocoa. Just remember to adjust the sugar in your recipe if your chocolate is sweetened. For those who prefer a healthier option, consider incorporating some finely ground almonds for a nutty twist.
How can I store leftover cookies?
Storing Chocolate Thumbprint Cookies properly ensures they stay fresh and delicious. Place the cookies in an airtight container at room temperature, and they should last for about 4-5 days. If you want to keep them even longer, you can store them in the fridge. Just be cautious, as refrigeration may alter their texture slightly — they can become a bit dry. Wrap them well in plastic wrap or use a zip-top bag to maintain moisture if you choose this route.
Can I freeze chocolate thumbprint cookies?
Absolutely! Freezing Chocolate Thumbprint Cookies is a fantastic way to have a delicious treat on hand whenever you want. To freeze them, allow the cookies to cool completely, then layer them in an airtight container with parchment paper between each layer to avoid sticking. When you’re ready to indulge, simply bring them to room temperature. You can also pop them in the microwave for a few seconds for that fresh-baked feeling! For an optimal experience, frozen cookies can last for up to 3 months—perfect for your spontaneous cravings.
For additional baking tips, check out resources from The Kitchn and Bon Appétit to enhance your cookie-making skills even further!
Conclusion on Chocolate Thumbprint Cookies
Baking is not just about mixing flour and sugar; it’s about creating memories and spreading joy. Chocolate Thumbprint Cookies embody this perfectly—each bite a sweet embrace for the soul. As you craft these delightful treats, consider sharing them with friends, family, or colleagues.
The smiles that follow every cookie handoff reinforce the age-old tradition of baking. It can turn a regular day into a celebration. So, whether it’s for a gathering or a simple treat for yourself, take a moment to relish not just the flavor but the joy of sharing these cookies. Happy baking!
For more tips on the baking experience, check out this article on enhancing your skills in the kitchen!
PrintChocolate Thumbprint Cookies: The Best Indulgent Treat Recipe

A delicious and indulgent recipe for chocolate thumbprint cookies, perfect for any occasion.
- Prep Time: 15 minutes
- Cook Time: 12 minutes
- Total Time: 27 minutes
- Yield: 24 cookies 1x
- Category: Dessert
- Method: Baking
- Cuisine: American
- Diet: Vegetarian
Ingredients
- 1 cup unsalted butter, softened
- 1 cup granulated sugar
- 2 cups all-purpose flour
- 1/2 cup unsweetened cocoa powder
- 1/4 teaspoon salt
- 1 teaspoon vanilla extract
- 1/2 cup chocolate chips
Instructions
- Preheat your oven to 350°F (175°C).
- Cream together the butter and sugar until light and fluffy.
- Mix in the vanilla extract.
- In a separate bowl, sift together the flour, cocoa powder, and salt.
- Gradually add the dry ingredients to the wet mixture, stirring until combined.
- Roll the dough into balls and place them on a baking sheet.
- Make an indentation in the center of each ball.
- Fill the indentations with chocolate chips.
- Bake for 10-12 minutes or until set.
- Allow to cool before serving.
Notes
- For a richer flavor, add a pinch of espresso powder to the dough.
- These cookies can be stored in an airtight container for up to a week.
Nutrition
- Serving Size: 1 cookie
- Calories: 120
- Sugar: 10g
- Sodium: 50mg
- Fat: 7g
- Saturated Fat: 4g
- Unsaturated Fat: 2g
- Trans Fat: 0g
- Carbohydrates: 15g
- Fiber: 1g
- Protein: 1g
- Cholesterol: 20mg
Keywords: Chocolate Thumbprint Cookies, cookies, dessert, baking