Introduction to Artisan Pizza Dough
Why Artisan Pizza Dough is a Game Changer for Homemade Pizza Lovers
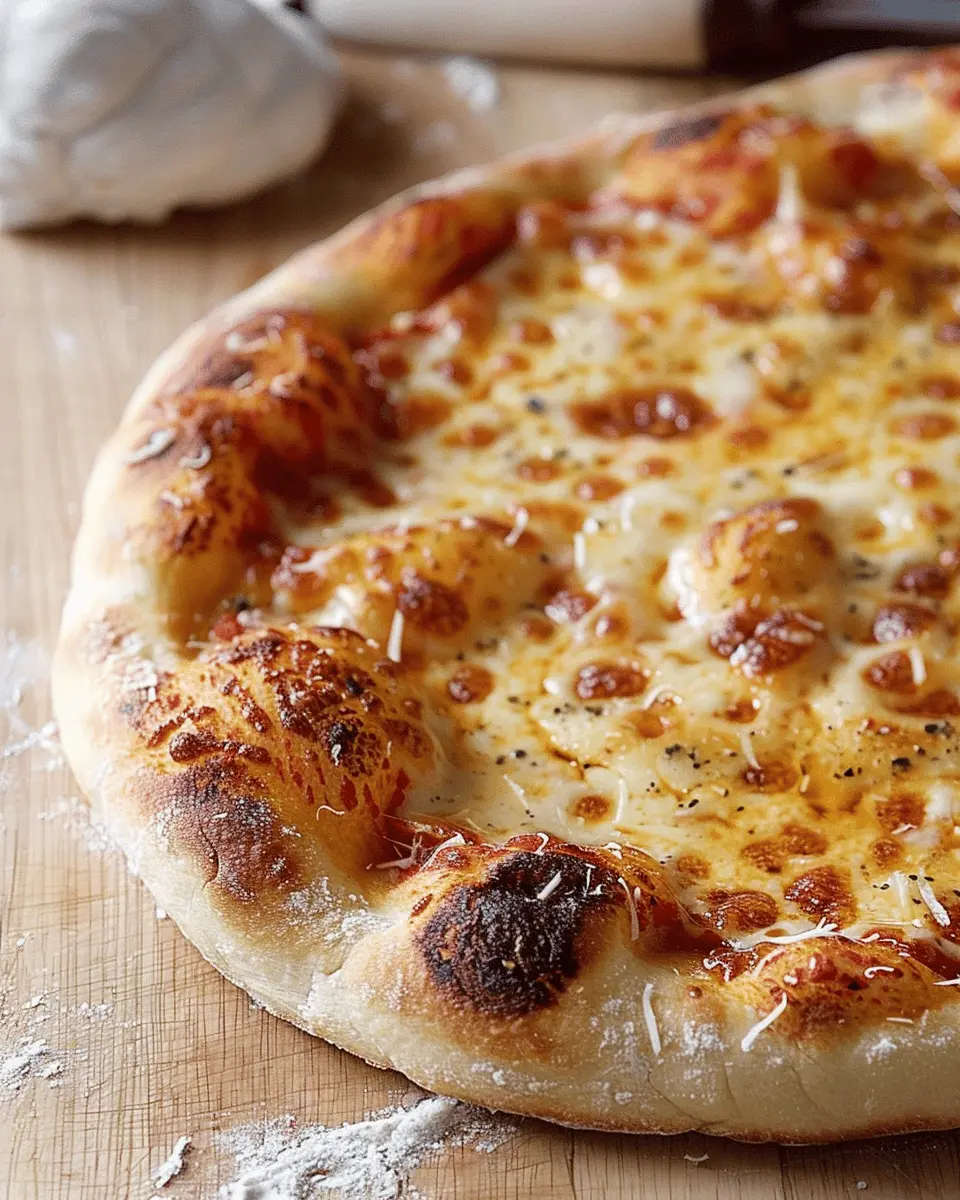
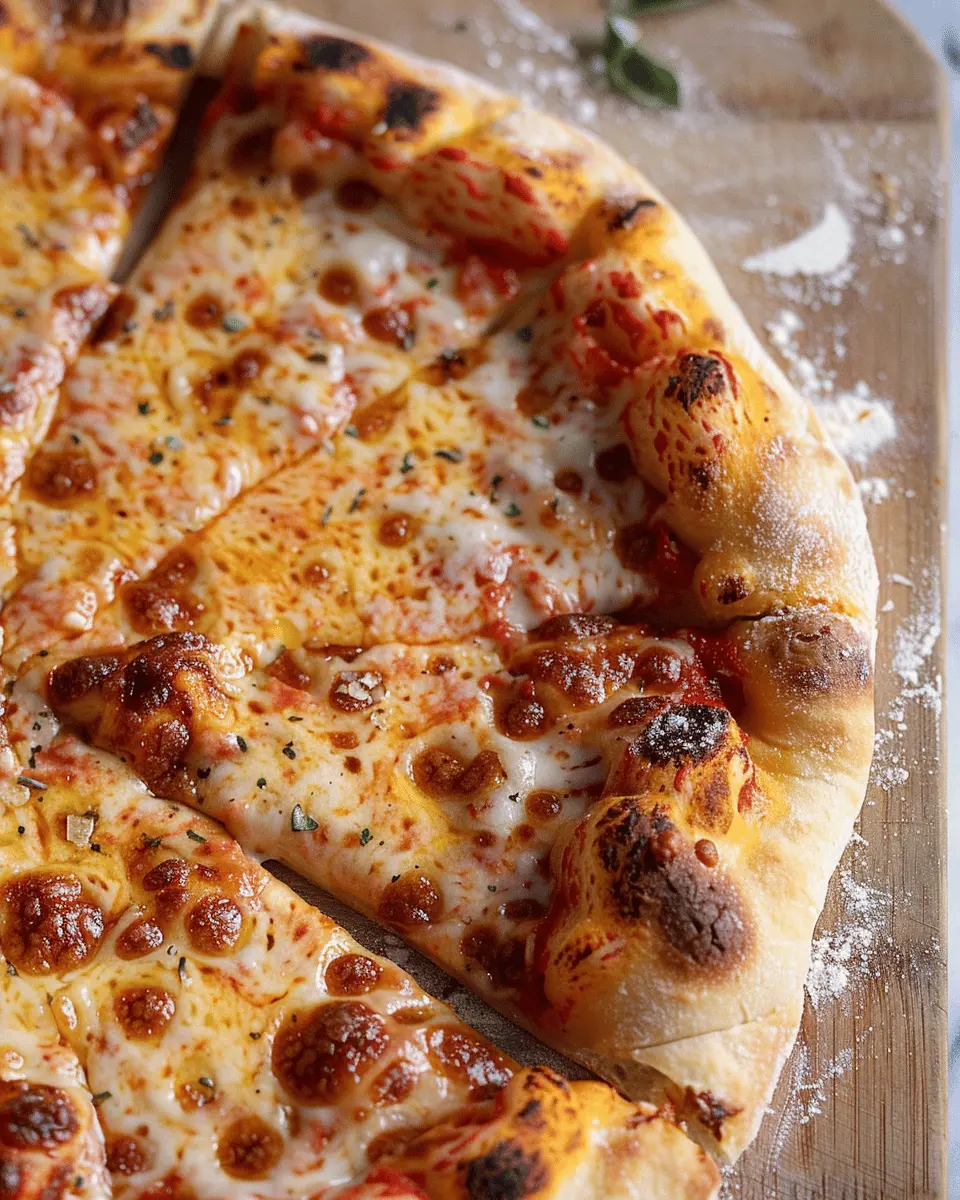
If you’ve ever enjoyed a slice of pizza with a crispy, chewy, and bubbly crust, you likely understand the magic that artisan pizza dough brings to the dining experience. This dough isn’t just about splashing water and flour together; it’s an art form rooted in tradition, technique, and a touch of science. But what sets artisan pizza dough apart and makes it a game changer for homemade pizza lovers?
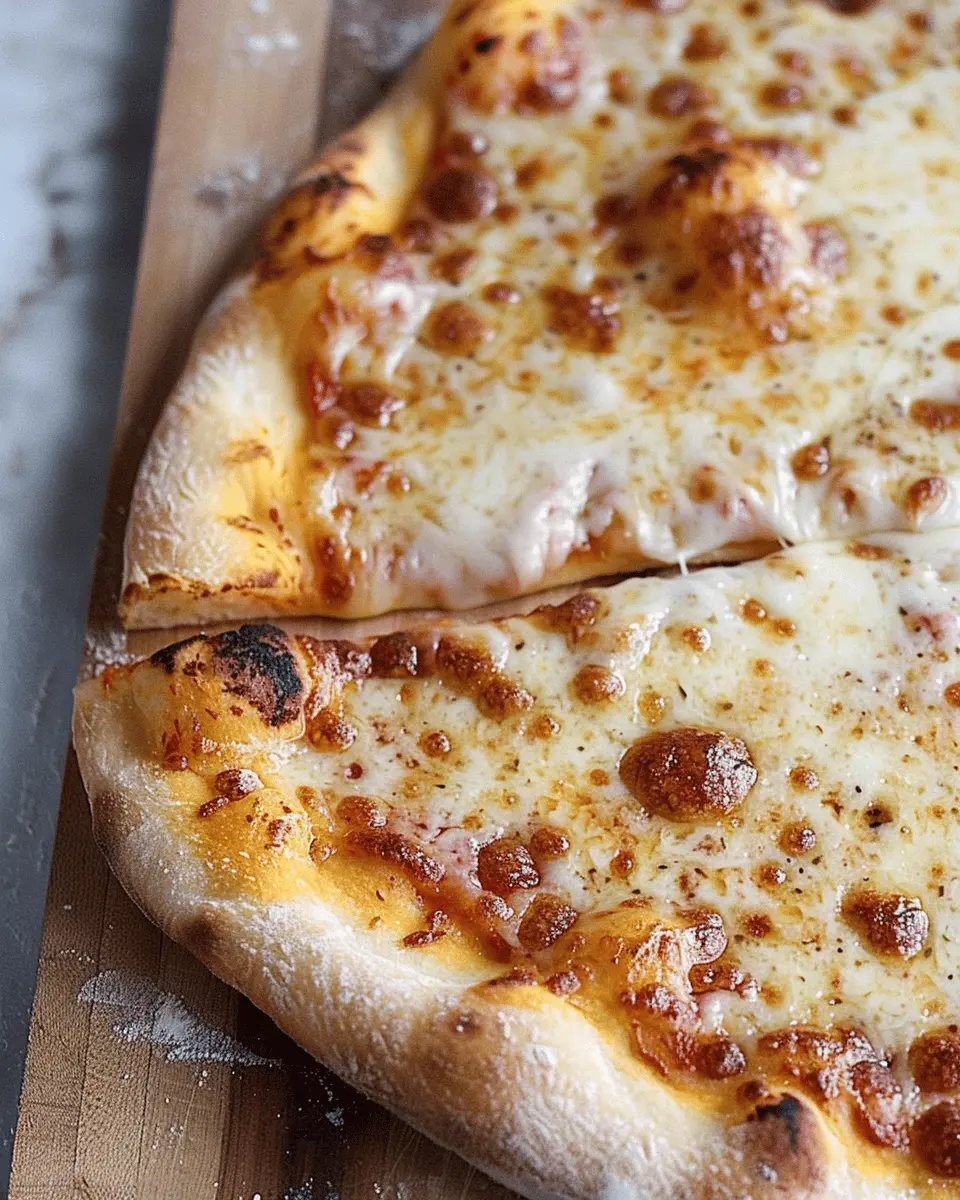
First, let’s talk about texture. Artisan pizza dough is known for its ability to create an incredible crust that combines a delightful crunch with a soft, airy interior. This unique texture comes from a longer fermentation process, often allowing the dough to rise slowly. According to experts at the New York Times, this fermentation not only enhances flavor but also translates to a more complex and satisfying bite. When you can achieve that level of texture at home, it makes every pizza night feel like a gourmet event.
Another exciting aspect of artisan pizza dough is the flexibility it offers. You can play around with various flours and hydration levels to customize your pizza crust to your taste. Want a whole wheat base for a nuttier flavor or a high-hydration dough for a bubbly crust? Go for it! It’s an avenue for creativity, allowing you to infuse your personal flair into every pie you craft.
Plus, the experience of preparing your own pizza from scratch is incredibly rewarding. As young professionals, we often find ourselves juggling busy schedules. Spending a few hours creating the perfect artisan pizza can be a therapeutic escape—a creative outlet that still results in a delicious meal. Have you thought about hosting a homemade pizza night with friends? It’s a fantastic way to showcase your culinary skills while enjoying quality time together.
Ready to dive in? Let’s roll up our sleeves and explore how to make artisan pizza dough at home, turning those weekend pizza nights into something truly special. For tips on choosing the best flour, check out this helpful guide from The Kitchn. Your journey to the ideal pizza starts now!

Ingredients for Artisan Pizza Dough
Essential ingredients for a crispy, chewy, bubbly crust
Creating the perfect artisan pizza dough is like crafting a masterpiece; it all starts with the right ingredients. To achieve that delightful combination of crispiness and chewiness in your crust, you’ll need the following:
- All-Purpose Flour: The foundation of your dough, providing structure and chewiness. For an even better texture, consider using bread flour, which has a higher protein content.
- Water: Preferably filtered and at room temperature. The hydration level is crucial for a bubbly crust; aim for about 60-65% water compared to the flour weight.
- Yeast: Instant or active dry yeast will work. This little powerhouse helps your dough rise and gives it that airy texture.
- Salt: Essential for flavor; it also strengthens gluten in the dough. Around 2% of the flour weight is ideal.
- Olive Oil: A touch of olive oil adds richness and helps with browning. It enhances the crust’s flavor, making each bite divine.
For a deeper dive into the science behind pizza dough, you can check out resources on Serious Eats or King Arthur Baking. Happy pizza-making!
Step-by-step Preparation of Artisan Pizza Dough
Creating the perfect artisan pizza dough is a labor of love, but the results are well worth it. Imagine biting into a crust that’s crispy on the outside, yet chewy and bubbly on the inside. Ready to embark on this delightful journey? Let’s go through the process step by step!
Combine Flour and Water for the Initial Mix
The first step in your artisan pizza dough adventure involves creating the dough’s foundation. You’ll need:
- 4 cups of bread flour (or all-purpose flour)
- 1 ½ cups of lukewarm water
- 1 teaspoon of salt
- ½ teaspoon of instant yeast
In a large mixing bowl, combine the flour and the salt. Then, sprinkle the yeast over the flour mixture. This initial step is crucial, as it ensures the yeast is evenly distributed. Slowly add the lukewarm water, mixing with a wooden spoon or your hands until no dry flour remains. You’re looking for a shaggy consistency—don’t worry about making it completely smooth at this stage. Allowing the dough to rest for about 20 to 30 minutes before proceeding helps the flour absorb the water, making gluten development easier later on.
Develop the Gluten Through Folding Methods
Once your dough has rested, it’s time to develop the gluten, which is key for giving your artisan pizza dough that desired chewiness. This is where folding techniques come in. Here’s how to do it:
- Lightly flour your work surface and transfer the dough onto it.
- With floured hands, gently stretch one side of the dough away from you and fold it over to the other side.
- Turn the dough 90 degrees and repeat the folding process.
- Do this for about 5 minutes until the dough feels smoother and slightly elastic.
This gentle folding technique activates the gluten without overworking the dough, resulting in a perfect balance between structure and tenderness.
Let the Dough Rise and Double in Volume
Now that you’ve developed the gluten, it’s time to let that dough rise. This bulk fermentation step will give your artisan pizza dough its flavor and texture. Place the dough in a lightly oiled bowl, cover it with plastic wrap or a damp cloth, and let it rise in a warm place for about 1 to 2 hours, or until it has doubled in size.
Here’s a tip: If you want even better flavor, consider letting the dough rise slowly in the refrigerator for 24 hours. This cold fermentation process will bring out a richer taste and enhanced aroma in the final crust.
Shape the Dough into Balls for Easy Handling
Once your dough has risen beautifully, it’s time to shape it into balls, which will make handling much easier when you’re ready to bake your pizzas.
- Lightly flour your counter and gently turn the dough out onto it.
- Divide the dough into 3 or 4 equal pieces, depending on how large you want your pizzas to be.
- Gently shape each piece into a ball by folding the edges into the center and rolling it between your palms until smooth.
- Place each dough ball on a floured surface, cover with a damp cloth, and let them rest for about 30 minutes.
This little resting phase allows the gluten to relax, making it simpler to stretch the dough into the perfect pizza shape.
Prepping the Oven for the Perfect Bake
Before you start shaping and baking, you must ensure your oven is fully prepped. Preheat your oven to its highest setting (usually around 500°F or 260°C) at least 30 minutes before baking. If you have a pizza stone, place it in the oven to heat up as well; this will help achieve that crispy crust we all love.
When you’re ready to bake, use a pizza peel or a flat baking sheet dusted with flour to transfer your shaped dough onto the hot stone. To enhance your crust, consider adding a sprinkle of cornmeal on your peel beforehand; this prevents sticking and adds delightful texture.
Ready to make some amazing pizzas? Enjoy crafting your artisan pizza dough and remember that practice makes perfect! Happy baking!
Variations on Artisan Pizza Dough
When it comes to making artisan pizza dough, the possibilities are as endless as your toppings. Here, we’ll explore two delightful variations that cater to different tastes and dietary preferences.
Whole Wheat Artisan Pizza Dough for a Healthier Option
Are you looking to incorporate more whole grains into your diet? A 100% whole wheat artisan pizza dough could be your ultimate solution. By swapping out regular flour for whole wheat, you’re not only enhancing the nutritional profile but also adding a subtle nuttiness to the crust.
Steps for making whole wheat dough:
- Use a mix of all-purpose and whole wheat flour for a balance of texture.
- Consider adding a tablespoon of vital wheat gluten to improve the dough’s elasticity.
- The result? A crisp yet hearty crust that complements a plethora of toppings, from fresh vegetables to your favorite lean proteins like turkey bacon or chicken ham.
If you’d like to dive deeper into the benefits of whole grains, check out this health article on whole grains.
Herb-Infused Artisan Pizza Dough for Extra Flavor
Want to take your artisan pizza dough to the next level? Infusing your dough with fresh herbs is an excellent way to do just that. Rosemary, thyme, or basil can enhance the flavor profile and truly make your pizza shine.
Here’s how to herb-up your dough:
- Incorporate 1-2 tablespoons of finely chopped fresh herbs directly into your dry ingredients.
- Pair them with olive oil to create a rich, aromatic base that elevates any topping.
- Not only does this add flavor, but it also transforms your crust into a standout feature, perfect for impressing friends during a pizza night!
Curious about more creative dough variations? Check out this link for some exciting flavor ideas!
By experimenting with these variations, you’re not only personalizing your pizza experience but also making it healthier and more flavorful. Happy baking!
Cooking Tips and Notes for Artisan Pizza Dough
Creating the perfect artisan pizza dough hinges on a few key elements that can make or break your crust. Here’s what you need to know for that crispy, chewy, bubbly delight.
Importance of Flour Type for the Perfect Crust
When choosing flour for your artisan pizza dough, opt for high-protein varieties like bread flour or even “00” flour, which are known for creating that desirable chewy texture. These flours contain more gluten, essential for the structure and elasticity of your dough. A study by the American Institute of Baking suggests that the right flour can enhance the dough’s hydration, fermentation, and overall flavor.
Tips for Achieving the Right Dough Hydration
Hydration is crucial for a successful artisan pizza dough. A ratio of 60-65% water to flour is a great starting point. Here are some tips to achieve that perfect balance:
- Use weight measurements: This precision helps you control hydration more effectively than volume measurements.
- Gradually add water: Start with some water in your mixing bowl, then slowly incorporate more as needed. Don’t rush it!
- Consider humidity: If you live in a humid area, you might want to reduce the water slightly. Conversely, if it’s dry, you may need a bit more.
Mastering these elements will set you on the path to pizza perfection! Don’t hesitate to check out Serious Eats for more pizza dough insights.
Serving Suggestions with Artisan Pizza Dough
Making your own artisan pizza dough is just the beginning. Pizza night can become a delightful culinary adventure with the right toppings and pairings.
Creative Topping Ideas to Keep Pizza Night Exciting
Don’t settle for basic. Elevate your pizza game with unique toppings, such as:
- Grilled vegetables: Think zucchini, bell peppers, and red onions for a burst of flavor.
- Goat cheese and arugula: Add a gourmet twist with creamy goat cheese and fresh arugula after baking.
- Turkey bacon and chicken ham: These options offer a delicious, savory focus while keeping things light.
Feeling adventurous? Check out this pizza topping guide from Food Network for more flavorful inspiration.
Pairing Artisan Pizza with Non-Alcoholic Beverages
Your artisan pizza deserves the perfect drink! Try:
- Sparkling water with lime: Refreshing and cleanses the palate after each flavorful bite.
- Herbal iced teas: Varieties like hibiscus or mint can complement the savory elements beautifully.
- Craft soda: Opt for artisanal brands that provide a unique twist without the excess sugar.
These simple pairings can elevate your pizza experience and keep everyone returning for more. Try them out, and let your pizza night become the talk of the town!
Time Breakdown for Artisan Pizza Dough
Creating a delicious artisan pizza dough isn’t just about throwing ingredients together — it’s about timing. Here’s a breakdown to help you master this culinary art.
Preparation Time
Getting started on your artisan pizza dough takes about 15 minutes. Measure your ingredients, mix them together, and knead the dough until smooth. It’s a great way to unwind after work!
Rising Time
Patience is key here. Allow your dough to rise for at least 1 hour at room temperature, or even better, let it rest overnight in the fridge for a more complex flavor. Did you know that slower fermentation can lead to a chewier texture?
Baking Time
Once your dough is ready, preheat your oven to its highest setting (usually around 475°F to 500°F). Bake your pizza for about 10-12 minutes until the crust is bubbly and golden. You’ll be rewarded with a crispy, artisanal crust that’s hard to resist.
For more tips on perfect pizza baking techniques, check out Serious Eats.
Nutritional Facts for Artisan Pizza Dough
When diving into the world of homemade pizza, understanding the nutritional facts of your artisan pizza dough can elevate your culinary experience. Let’s break it down:
Calories per serving
Each serving of artisan pizza dough typically clocks in at around 200-250 calories, depending on the ingredients and toppings. This means you can enjoy a slice without guilt, especially when paired with fresh veggies or lean proteins.
Protein content
Packed with approximately 8 grams of protein per serving, your artisan pizza dough helps satisfy those cravings while supporting muscle health. Pair it with lean proteins like turkey bacon for an even more nourishing meal!
Sodium levels
Keep an eye on sodium levels, which generally range from 400-600 mg per serving. Opting for low-sodium toppings can help maintain healthier levels, perfect for those mindful of their salt intake.
For more insights on making healthier pizza choices, check out resources like Healthline for expert advice. Enjoy crafting your pizza masterpiece!
FAQs about Artisan Pizza Dough
How do I know when my dough has risen properly?
Knowing when your artisan pizza dough has risen can be a bit tricky, but a simple poke test can guide you. Gently poke the dough with your finger. If the indentation slowly springs back without losing its shape, it’s ready to rock! Looking for more tips? Check out this guide on dough fermentation.
Can I make artisan pizza dough in advance?
Absolutely! Making your artisan pizza dough in advance is not only practical but can also enhance its flavor through a process known as cold fermentation. Simply prepare the dough as per your recipe, then wrap it tightly in plastic wrap and store it in the refrigerator for up to three days. When ready to use, let it come to room temperature before shaping. This technique allows the dough to develop deeper flavors that will elevate your pizza experience.
What are the best toppings for homemade artisan pizza?
When it comes to toppings, the world is your oyster! Here are some crowd-pleasing options:
- Sauces: Classic marinara, pesto, or white garlic sauce.
- Cheeses: Fresh mozzarella, sharp cheddar, or creamy goat cheese.
- Meats: Try Chicken Ham or Turkey Bacon for a savory kick.
- Vegetables: Fresh arugula, sliced bell peppers, or caramelized onions.
- Extras: A drizzle of olive oil or balsamic glaze post-baking can take your pizza to the next level.
Experiment with combinations and find what satisfies your taste buds! By the way, did you know that the average American eats about 23 pounds of pizza each year? That’s a lot of topping experimentation!
If you’re intrigued by craft pizza-making, explore other resources or check out some artisan pizzerias in your area for inspiration.
Conclusion on Artisan Pizza Dough
Recap of the joys of making your own artisan pizza dough
Creating your own artisan pizza dough can be an incredibly rewarding experience. There’s something special about transforming simple ingredients into a crispy, chewy, and bubbly crust that stands as the foundation for your favorite toppings. It’s an art that encourages creativity in the kitchen and invites friends and family to gather around, sharing not just a meal but memories.
Plus, making dough from scratch allows you to control the quality and flavor. Whether you choose to experiment with herbs or go classic, each batch becomes a reflection of your personal taste. So, why not roll up your sleeves, unleash your inner pizzaiolo, and enjoy the delightful process of crafting your perfect pizza? For a deeper dive into the nuances of pizza making, check out resources like the Pizza School for tips from experts!
PrintArtisan Pizza Dough Recipe for a Crispy, Chewy, Bubbly Crust

Learn how to make artisan pizza dough that results in a crispy, chewy, bubbly crust, perfect for your homemade pizzas.
- Prep Time: 15 minutes
- Cook Time: 15 minutes
- Total Time: 2 hours 30 minutes
- Yield: 2 pizzas 1x
- Category: Pizza
- Method: baking
- Cuisine: Italian
- Diet: vegetarian
Ingredients
- 4 cups bread flour
- 1 and 1/2 cups warm water
- 2 teaspoons salt
- 1 teaspoon sugar
- 1 tablespoon active dry yeast
Instructions
- In a bowl, combine warm water, sugar, and yeast. Let it sit until foamy.
- Add flour and salt, mixing until a dough forms.
- Knead the dough on a floured surface for about 10 minutes.
- Place the dough in a greased bowl, cover, and let rise for 1-2 hours.
- Preheat your oven and prepare a pizza stone or baking sheet.
- Shape the risen dough into pizza bases and add your favorite toppings.
- Bake in the preheated oven until golden and bubbly.
Notes
- For best results, use a pizza stone.
- Let the dough rest longer for more flavor.
Nutrition
- Serving Size: 1 slice
- Calories: 220
- Sugar: 1g
- Sodium: 350mg
- Fat: 1g
- Saturated Fat: 0g
- Unsaturated Fat: 0g
- Trans Fat: 0g
- Carbohydrates: 44g
- Fiber: 2g
- Protein: 8g
- Cholesterol: 0mg
Keywords: artisan pizza dough, crispy crust, chewy crust, bubbly crust